This is Lynn here. I just have to tell everyone that I have the BEST sister ever! Why, might you ask? Because she and her husband got me my very own Kitchenaid Mixer for Christmas.
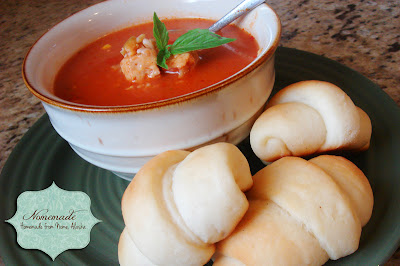
I have been falling in love with my mixer and using it non-stop. Seriously, I've considered knitting it a sweater because I adore it so much. With my new mixer I have tried out various roll recipes and I just have to share the one that I think is the absolute BEST. Not only is the recipe easy, but they come out so soft and buttery and they just melt in your mouth.
Ingredients:
- 2 c warm water
- 2/3 c nonfat dry milk powder
- 2 Tbsp dry yeast
- 1/4 c sugar
- 2 tsp salt
- 1/2 c butter
- 1 egg
- 4 1/2- 5 c all purpose flour
Directions:
- In a Kitchenaid mixing bowl, stir in warm water and nonfat dry milk powder until it dissolves.
- Add yeast, then sugar, salt, butter, egg, and 2 cups of flour.
- Mix on low speed until ingredients are wet, then 2 minutes at medium speed.
- Add 2 more cups of flour, mix on low speed until ingredients are wet, then 2 minutes at medium speed. (You can switch your attachment to the dough hook at this point for easier mixing.)
- Add 1/2 cup flour again, mixing on low speed until wet, then 2 minutes at medium speed. You can add an additional 1/2 c if your dough is still too wet but I usually stop at 4 1/2 cups of flour total.
- Dough should be soft, not overly sticky, and not stiff.
- Scrape the dough off the sides of the bowl and pour about 1 tablespoon of vegetable oil around the sides of the bowl so that the bowl is coated.
- Spray some plastic wrap with non-stick coating and place the plastic over the bowl. Allow it to rise in a warm place until the dough doubles in size and rises to the top of the bowl.

9. Once the dough has risen, place your dough on a flat floured surface, then divide the dough in half.
10. Roll out 1/2 the dough into a circle.
11. Using a pizza cutter, cut the dough into 16 even slices.
12. Begin to roll the slice of dough in, starting from the wide end and tuck the small point underneath.
13. Place rolls on parchment-lined baking sheet.
14. Repeat steps 10-13 for the 2nd half of the dough and let them rise for 1- 1 1/2 hours, until double in size.
15. Bake at 375 F for 15-20 minutes or until golden-brown.
16. Brush with melted butter while hot.
And if you're new to making rolls (which I was until just a few months ago) there are some great tips that you can find on my friend, Ali's website
HERE.
So get baking to warm up your home and your tummy during this VERY cold winter!
Feel free to "Pin" to your heart's content!


